Ahh, the classic French Croissant!
Welcome to our second cooking class in Paris.
We return to La Cuisine Paris
located along the River Seine. What a
lovely location and such fun people
to get to interact with.
Today we are learning croissants
and breakfast breads. I think this
is one of their most popular classes
as it fills up so quickly.
Here is our wonderful bread teacher
Justin
who is teaching us croissants today
and later he taught us the boulangerie
class. He trained in Paris at Ferrandi.
The kitchen is all set up with our bowls
and cups and dishes with ingredients
measured out.
We will be hand mixing and kneading
the bread, no Kitchenaids for this class!
You start by making a mound of flour
and using the bottom of your bowl
you make a large well in the center with
thick enough walls of flour so that your
liquids will not flow out.
The we broke fresh yeast into the
liquids in the center. I had never used
fresh yeast before and the smell is amazing.
You slowly mix the flour around the edge into the liquids
until the liquids will no longer run out and then
using a dough scraper, scrape the remaining
flour into the wet mass and begin to knead it.
It was fun seeing beginning bread makers learn
how to knead bread. I have been making and
hand kneading bread since I was a little
girl at my mother's side. My technique
was different than the teachers but it
was natural for me.
Of course at home I always make it in
my Kitchenaid or Bosch mixers.
Next we folded a piece of parchment
paper into size and then cut
the butter in half.
We next put the butter back together
into a rectangle. He said to do this
so that you had a more even rectangle
of butter.
I need to digress here for just a moment
as we learned that American butter has
a lot more water pumped into it so to
make the intense tasting croissants
and breakfast breads we did, we were told
that we have to find European butter.
I have to agree as I had tried making
croissants in the past and it just tasted
like a nice crescent roll, so I will have
to scout out butter at Whole Foods or
some higher end stores and I will have
to find fresh yeast too!
Next the cold butter is folded up into our neat
parchment package
which we then gently rolled to spread the
butter evenly out to the four corners
of our package.
This is popped in the freezer for a
few minutes so that it is nice and cold.
You can see in that precious picture of
Justin that the butter is super thin.
Meanwhile we are going to take our lovely
ball of dough that has been resting
and we are going to score it.
Placing our thumbs in the center of the
scoring we will stretch it out into a square.
That was a pretty cool trick!
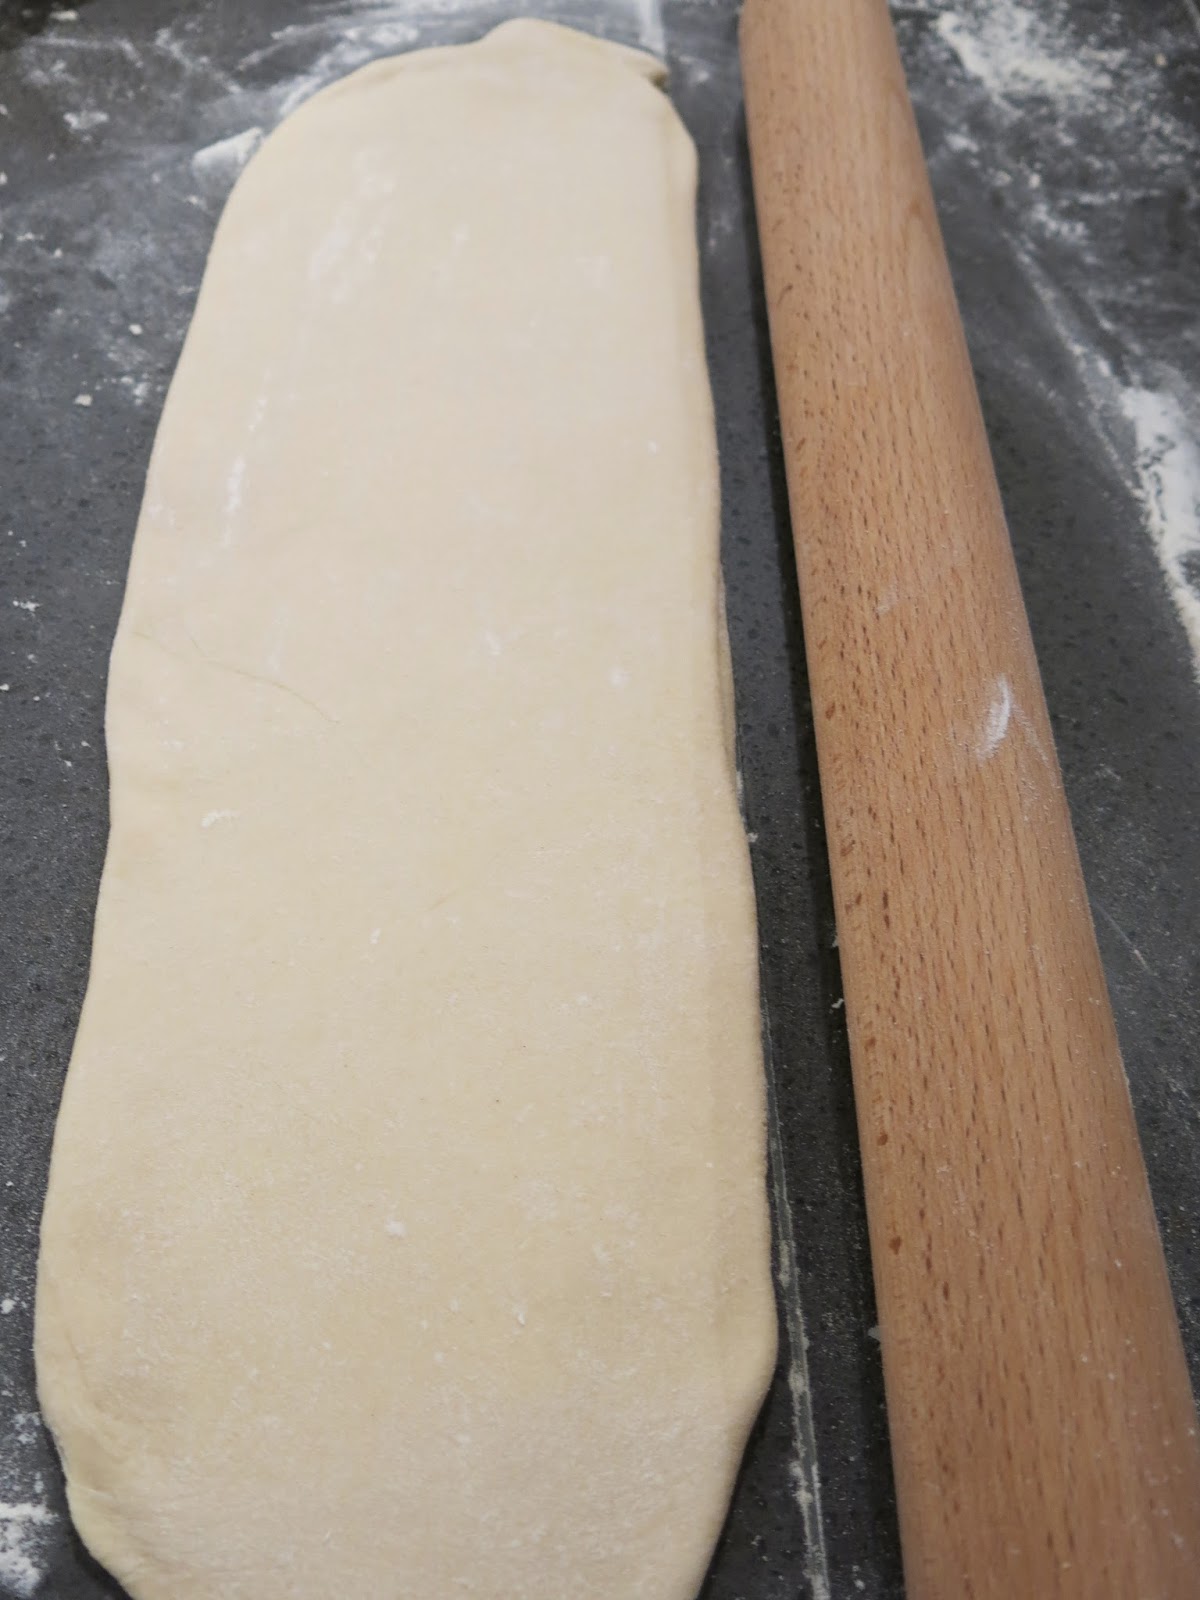
The dough is then gently rolled into
an oblong about the length of our
rolling pin which was about 20 inches long.
(This was a special professional rolling
pin that is not tapered nor does it have
handles so you can use it to roll out corners
to try and make our dough oblong.)
We are constantly brushing the excess flour
off with our special croissant brush! It was
as soft as could be. Of course we all wanted
to go and buy one of these by the end of
the course.
Notice how oblong the dough is and the corners
are almost square.
Here the butter is still in the paper and we are
testing to see if the dough is large enough.
The dough is rolled out to just about 3/4 inch
bigger than the butter on the sides and top and
1/3 longer than the butter on the bottom.
Remove the cold butter from the parchment paper.
Place the butter down on the dough and fold that
bottom third up and over.
Then continue folding into thirds until you
end up like this.
Flour it well and turn it lengthwise.
Roll the dough out softly, never going over the ends
and rolling out from the center in one
direction only. You don't want to squeeze
butter out of the dough.
Then repeat the folding into thirds and
place it into the fridge for about 30 minutes.
These steps are repeated a minimum of
3 times and up to 6 times. The more folds
you make, the more layers of flakes you have.
We only had time to do three folds in our 3 hour
class.
Always remember to brush off the excess
flour in between. You want to use enough flour
so that the dough doesn't stick to the counter
but you don't want to keep any excess flour
on the dough so that it interferes with the layers.
This is called the lamination process.
Now it is time to shape.
For Croissants:
Roll dough out to shape and cut into
triangles with two equal length sides (an isosceles triangle)
Cut a slit at the wide side. Stretch it a little as you roll it
up from the wide end. I have also heard to make a
small ball of dough and place it just above the slit so
that your croissants are much puffier in the center
like commercial ones.
(I measured the commerical croissants
in Paris and some of them are 9 inches
across!!)
I am definitely trying that.
Now let the dough rise until doubled.
Now we turned to other breakfast breads.
This is hubby's favorite wherever he goes
pain au chocolat.
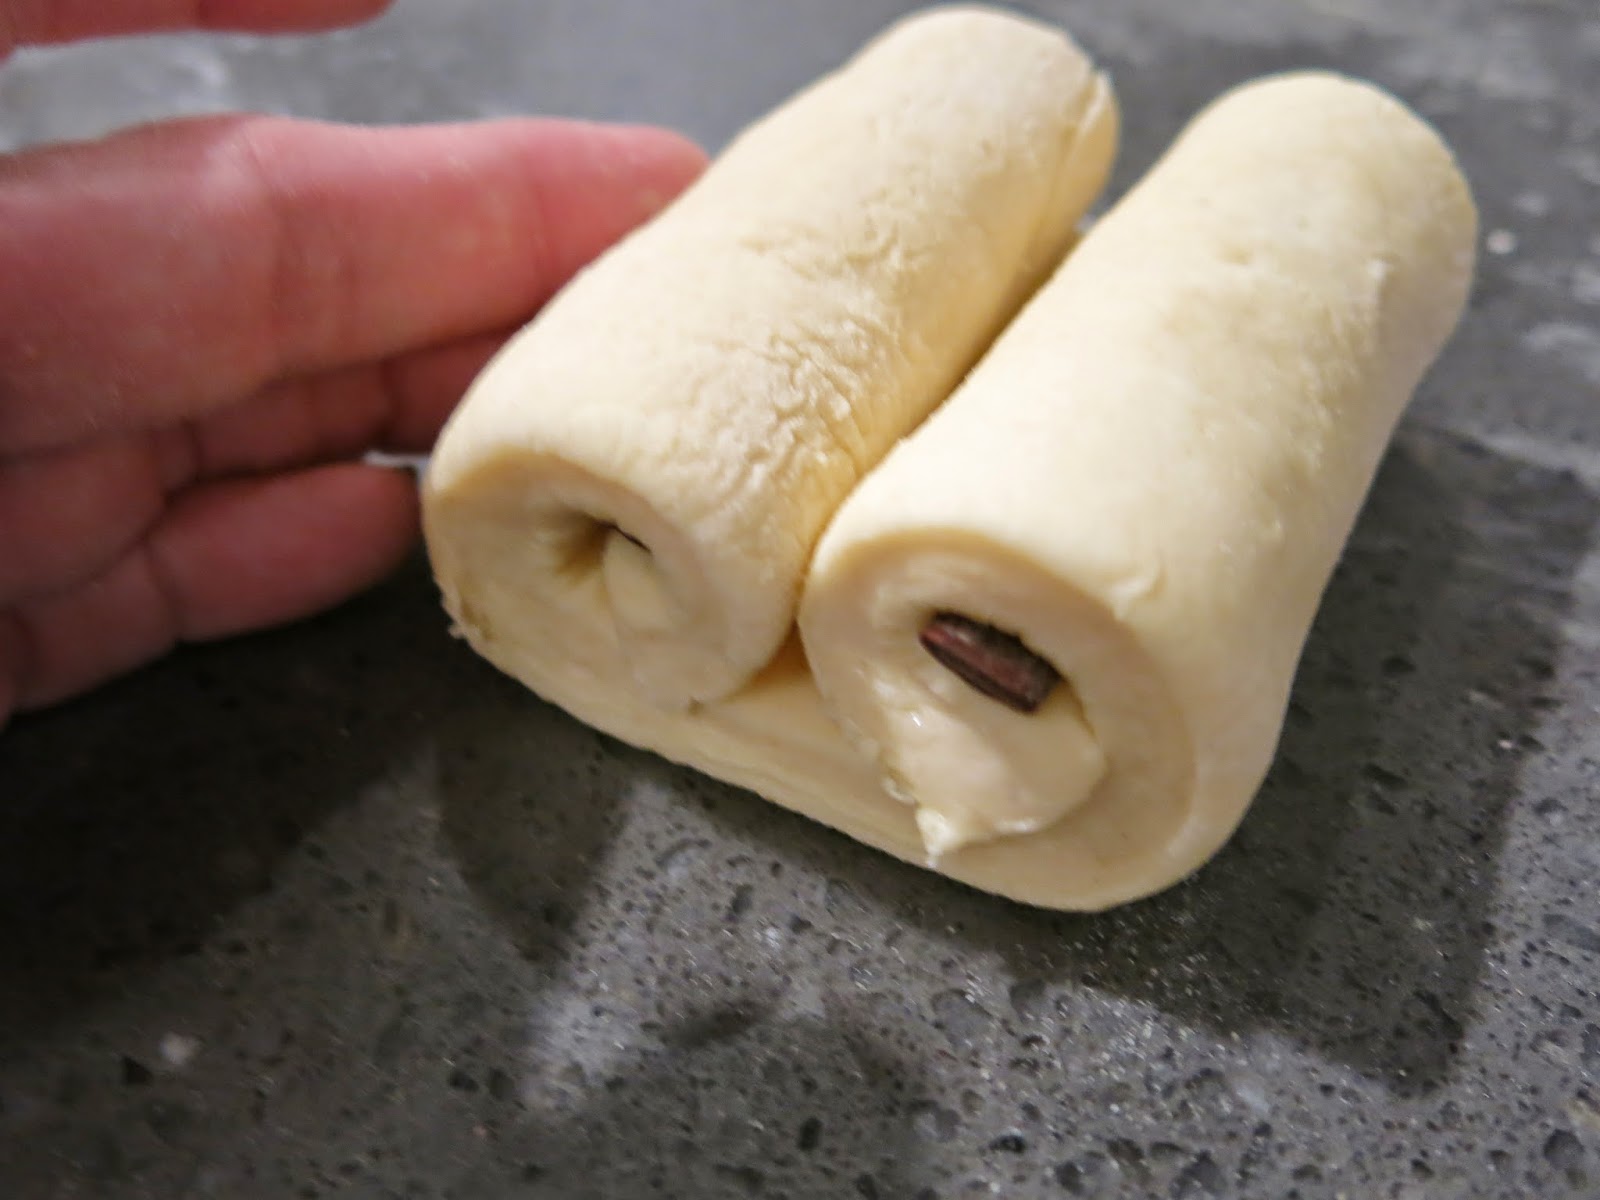
There are two ways to make it - rolling from
both ends or just one end. I chose rolling
from both ends.
We used these batons de chocolat which
can be ordered online. I found some at King Arthur Flour.
He said that you need
at least 44% cacao so that the chocolate doesn't
seep out while baking.
Next we layered homemade pastry cream with
chocolate chips or raisins and cut them into
strips or twisted them into knots.
After rising, we glazed with an egg wash and then
they were placed into a very hot
oven. After baking a final glaze of sugar water was added
so that the first taste in your mouth is a touch of
sugar followed by the butteriest butter!
Oh, wow, these were incredible. We
each got to take a bag full with us.
Heaven!!
(Invest in a digital scale as the Europeans
and most bakers weigh their ingredients to be
perfectly accurate. He didn't even allow us to
wash the sticky dough off of our hands as that
would change the ratio of dough to butter. We
had to use a dough scraper and carefully
scrape of as much dough as possible.)
Croissant Dough
250 g. bread flour
5 g. or 1 tsp salt (most digital scales are not that accurate
in really small weights like 5 grams
so you can measure salt out with a spoon.)
35 g. sugar
10 g. fresh yeast (5 g. instant yeast)
120 g. warm water
25 g. (1 T.) melted butter
125 g. unsalted butter
Egg Wash
1 egg
Whisk egg until frothy.
Sugar Syrup
100 g. sugar
50 g. water
Bring the sugar and water to a boil
and then let cool.
Dough
(These are the by hand method. I will be
using the traditional heavy duty mixer and
bread hook, but I will include his traditional
hand methods.)
Pour flour into mound on counter. Make a large
well in the center with the bottom of your bowl.
Pour in the warm water. Crumble the fresh
yeast into the warm water and mix it in with
your fingers. Then pour the sugar and melted
butter into the water.
Begin mixing by bringing a little of the edge
of the flour well into the center with your two
fingers, continue to do so until no water can
run out and then use a dough scraper and mix
the remaining flour in until it is all incorporated
and forms a ball.
Knead the dough for about 10 minutes, then
cover and let rest for 30 and let rest in the
fridge for at least 6 hours.
Meanwhile, taking about a 18x20inch
piece of parchment paper,
place the paper and fold it into thirds
lengthwise and then turn it and fold
the ends meeting at the center
so you end up with a nice rectangular
packet to place the butter in.
It will end up being about 6x9 inches.
The butter should be cold. Place it
inside the paper and gently push the
butter out to the edges making it
even. Be careful not to roll over
the edges as you may break the
paper open. Place in the fridge or
freezer to harden.
Take the chilled dough out and score
it as shown in the pictures above and pull
the center out to create a square. Roll it into
about a 10x20 inch oblong. Test the size to
be sure your butter will be encased in
the dough as shown in the above pictures
with 1/3 of the dough covering half of the
butter and about a 1/2 to 3/4 inch margin of
dough surrounding the butter on the other
three sides.
Dust excess flour off between all rollings
and foldings so that no excess flour will
interfere with the laminating process (the
layers of butter between dough).
Fold up the bottom third of dough
over half the butter and then make another
fold encasing the butter. Gently roll out
into another oblong and repeat the three
part roll. Never roll over the edge as you
don't want to squeeze the butter out.
Dust off flour and cover with plastic
wrap. Refrigerate for 30 minutes.
Repeat this process 3 - 5 times refrigerating
between each time.
Now it is time to shape the breads.
For Croissants:
Roll the dough out into a rectangle
and shape and straighten the dough. Cut
into an isosceles triangle (2 equal sides).
Cut a slit as shown in the photo above. Place
a small ball of trimmings dough in the center
if desired and stretch a little as you roll the
dough up. Place the point down. Let rise
at room temperature until doubled.
Brush with egg wash.
Have the oven heated to 500.
(The high heat creates the crust.)
Create steam by spraying with a
bottle of water about 20 times into
the oven. Then place the pan of
raised dough into the oven and
reduce heat to 350 and bake
for about 15 minutes or until golden.
Brush with sugar wash after coming
out of the oven.
For Pain au Chocolat
Roll the dough into a rectangle and then
cut into oblongs. Place a chocolate baton
at each end and roll to center.
Brush with egg wash.
Have the oven heated to 500.
(The high heat creates the crust.)
Create steam by spraying with a
bottle of water about 20 times into
the oven. Then place the pan of
raised dough into the oven and
reduce heat to 350 and bake
for about 15 minutes or until golden.
Brush with sugar wash after coming
out of the oven.
For Pan Suisse - Pastry Cream Filled
We made home made pastry
cream and then spread it on the dough
and sprinkled chocolate chips or raisins
on and folded it over and then cut into
strips or twisted them.
Brush with egg wash.
Have the oven heated to 500.
(The high heat creates the crust.)
Create steam by spraying with a
bottle of water about 20 times into
the oven. Then place the pan of
raised dough into the oven and
reduce heat to 350 and bake
for about 15 minutes or until golden.
Brush with sugar wash after coming
out of the oven.
Oh, the fresh yeast and the European butter
made these so fabulous!
Of course hubby gobbled the Pain au Chocolat
but I savored the plain butter croissant.
We walked away with a bag full of
buttery goodness that we enjoyed as we
continued to tour Paris. There is nothing
like peeling off layer after layer
of tender, buttery croissant!
What a treat to get to make these flakey
wonderful breads in Paris.


Oh, J! How lucky you are to be in Paris! And to take a class! This was a fascinating post on making croissants. I got a little lost with the folding part but I'm like that with instructions, I need a video! Ha! I have to go back and read previous posts. I know you must be having a ball! :)
ReplyDeleteJane
This comment has been removed by the author.
ReplyDeleteAbsolutely delicious!! Well worth the work!! Blessings, Catherine
ReplyDeleteFun fun fun!
ReplyDeleteI keep batons on hand too!
I'd love to be a taste tester:@)
ReplyDeleteOh wow how yummy, awww to be in Paris taking these great cooking classes must be so fun and exciting ;-)
ReplyDeleteSmiles~
Mari
Yes, I would like to make these at least once. Great instructions. So fun to see you this past week. Thanks for everything. It made a less than fun thing more fun! Joni
ReplyDeleteThis comment has been removed by the author.
ReplyDeleteOwwww wowwwwww amazing !!! love this post !!!...yammie !!!...love Ria...x !
ReplyDeleteJacqueline, I'm loving all your Paris posts! We just returned from Disney World and my entire family looked at your Paris Disney pictures. But this post with the pain au chocolat (also my favorite pastry) has me wishing I was a baker. I need more patience! I always thought the European butter was so different because of the cream from the diet of the cows, as the milk and dairy products are all somewhat different from ours. So interesting about the water content. I think you might find the butter in a regular supermarket, at least we can here. Sometimes it is even with the cheeses! Your dough triangle with the split bottom looks like a mini Eiffel Tower to me. Thank you for these wonderful Paris posts! Linda
ReplyDeleteOK...so NOW it occurs to me!!! Chef is 1000% right about not washing hands while working with the dough! That makes sense! Why in the heck didn't I think of that before??!?! I will from here out just keep an extra spatula or a towel handy if I have to get a little dough off my hands. I've never made croissants, but I'm sure the same principle applies to making pie crust. Great tip!
ReplyDeleteYou have to just be in hog heaven with all of this newfound knowledge! I'm so proud of you and happy for you to be able to actually acquire firsthand tutelage IN FRANCE. What an experience!
I just bought a package of croissants from Costco this afternoon, but they don't compare to these, I'm sure! (I'm planning to try croissant French toast in the morning!)
Have a beautiful weekend!
I'm drooling! Thank you for sharing all of this wonderful information! Your class must have been so much fun. I've purchased Danish butter in the past which was wonderful. I'll have to look for fresh yeast also.
ReplyDeleteThose looked absolutely delicious! When I was in Toulouse, my favorite thing was walking from shop to shop, buying small chocolate croissants. Yum! I resolve to try the recipe by mid-year, I hope!
ReplyDeleteMichele